Intro
Hip pain can hold you back from doing the things you love. Maybe you can relate to the following story.
A Setback on the Slopes
It’s the first ski outing of the year, and you and your partner are thrilled to hit the slopes after a long off season.
For a warmup, you decide to hit a small, green trail to get your bearings and build confidence. Plus, you want to check the status of your hip. It occasionally gives you aches and pains, but it’s been okay for a few weeks.
You ski down the trail, no sweat. Your hip feels totally okay.
Then, you hit another trail. As you ski down the trail, your hip wakes with a dull ache, and a sliver of doubt creeps into your head. Your face subtly winces. Your partner, who also knows what’s going on, asks, “Everything okay?”
You reply, “My hip is starting to bug me a little. Maybe it needs to warm up more. Let’s go again.”
You ski the same trail again, and the dull ache increases in intensity like a pot of water slowly coming to a boil. Your excitement wanes as it’s slowly replaced with frustration.
You head into the lodge for a break. “I can’t believe this is happening again,” you think to yourself.
After a few minutes, you leave the lodge, and you think, “I’ve rested my hip before it got really bad, so hopefully we’re good for the rest of the day. Man, I really don’t want to deal with this right now.”
Midway through your next trail, the pain in your hip radiates with heat and anger. It feels like someone took a knife and thrusted it into your hip. The pain steals all of your excitement and joy giving way to frustration, depression, and anger.
“Unbelievable!” you yell.
“What’s the matter?” your partner asks.
“My hip again. I need to stop for the day. Sorry babe.”
You reach the bottom of the trail, and you feel discouraged, frustrated, and pouty. You both pack up your skis and head home. Another day, another reminder that your hip pain limits your activity.
Limits your happiness.
Limits you.
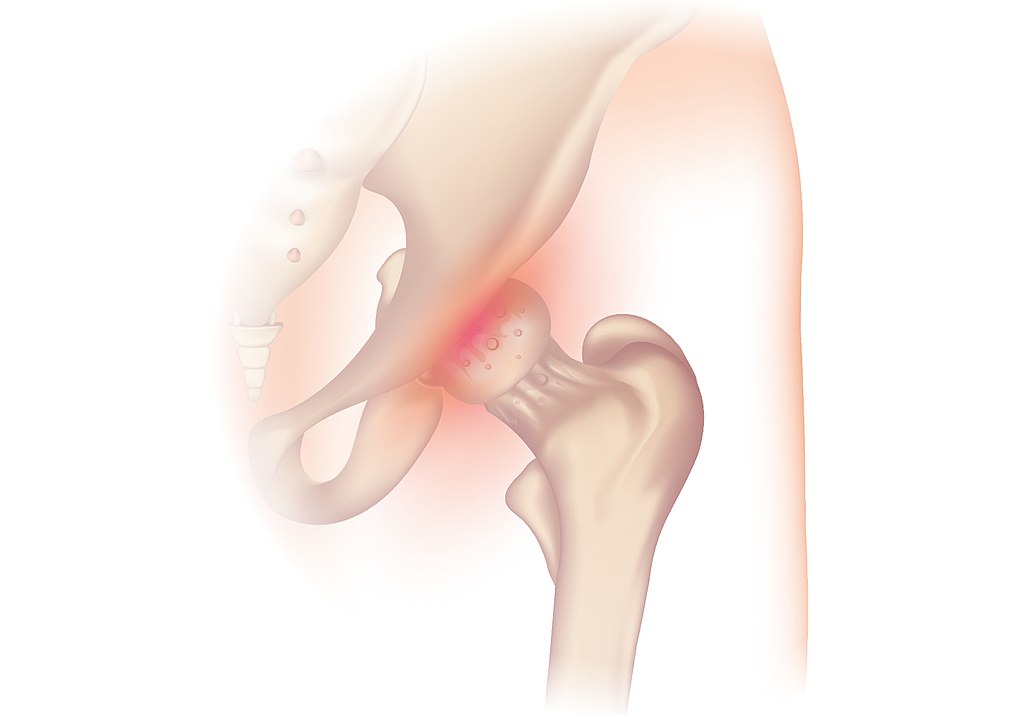
Hip Pain Sucks
Every year, every month, every week you try to do something you love, but the pain in your hip holds you back.
The hips are involved in everything you do. From participating in sports like skiing, pickleball, golf, and tennis to everyday tasks like picking up the laundry, getting the groceries, and cleaning the house. Not to mention, they’re involved in spending quality time with loved ones. If your hips hurt, it’s harder to enjoy life.
Hip pain is no joke.
What can you do to get out of hip pain? To play the sports you love and carry out normal, everyday tasks without hip pain? What can you do to get your life back?
Well, read on and hopefully I can shed some light.
Top 3 Principles for Training with Hip Pain
In the first part of this article, we’ll go over three principles for training around hip pain. Then, we’ll go over the exercises you can use to strengthen your hips.
Principle 1- Seek Both a Physical Therapist and a Personal Trainer
I’m a personal trainer, and I’ve worked with many people who have dealt with hip pain. However, my role in that process is much different than the role of a medical professional like a physical therapist. My role is to increase your strength and help you train around pain, so it doesn’t get worse. Whereas, the physical therapist’s role is to diagnose and treat your hip pain through rehabilitation exercises and manual therapy.
The medical professional is not better than the fitness professional and vice versa. But, there are things a physical therapist can do that a personal trainer cannot. And, there are things a personal trainer can do that a physical therapist cannot. Together, they can help you get out of hip pain. When my clients’ physical therapists and I work closely together, the clients get the best program possible. A physical therapist tells us what exercises to do and what exercises not to do, and I ensure the quality of those exercises.
You might be thinking, “I don’t need to see a physical therapist.” However, if your hip pain has not improved in two weeks and/or it affects your sleep (i.e. wakes you up at night, keeps you from falling asleep, etc.), you need to see a physical therapist. Especially if the latter is true, poor sleep will negatively affect many more aspects of your life. Don’t let your hip pain manifest into something else.
See a physical therapist and connect them with your personal trainer.
Principle 2- Don’t Train Through Hip Pain; Train Around Hip Pain
If you feel pain during exercise, stop. Many well-intentioned trainees believe that pushing through pain will make the pain go away. They think pushing through the pain and strengthening the muscles around the pain site will make the pain go away.
I also want to strengthen the muscles around the pain site, but it needs to be done with pain-free exercises.
Here’s why.
Pain is a signal from your brain to your body. When your brain senses danger, it sends a pain signal as a way of saying, “Stop doing what you’re doing, or something bad will happen.” If you ignore that signal, your brain amplifies the pain in an effort to urge you to stop.
It’s like when you tell your kid to stop playing with the fork in the outlet. You holler, “Sweetie, don’t put the fork in there!” They continue to move the fork around the outlet, so you scream, “Stop it!” They still don’t listen, so you scream louder, “Stop playing with the outlet!” Soon enough, you’re running to your child in a fit of fear and rage to get them to stop.
Pain works in a similar way. The more you don’t listen to it, the more intense it becomes.
On top of that, if you continue to push through pain, it takes a smaller stimulus to elicit a more intense response. For example, walking up the stairs didn’t bother you that much a few weeks ago, but now it hurts. What didn’t bother you before now bothers you a lot.
Instead of training through pain, train around pain. Find exercises that don’t hurt, and progress those exercises slowly over time. Which leads directly into our third and final principle.
Principle 3- Progress Slowly
A slow progression is a gradual increase in the intensity, volume, duration, or complexity of a movement over time. Credit to ChatGPT for helping me put that into words. For example, if we’re progressing via intensity (aka weight), an increase by 2.5lbs per week is a slow progression. If you did DB Bench for 45lbs last week, doing 47.5lbs this week would be a slow progression.
Slow progressions are the way to go in any strength training program.
However, in the context of working around pain, slow progressions are that much more important. Why? If you ask your body to do something it’s not ready for, you run the risk of causing pain or injury. A split squat with 25lbs might be pain free, but if you jump from 25lbs to 60lbs in the next set, that might cause pain.
Start off easy, then make it a little more challenging overtime. Always progress slowly.
Hip Pain Principles Recap
To recap the principles we have…
- Seek the help of both a physical therapist and a personal trainer. Connect them, so they can build the best program possible for you.
- Don’t train through pain. Train around pain, so you don’t increase the pain signal going to your hips.
- Progress slowly, so you reduce your risk for causing pain and maximize your chances of getting better.
Without further ado, let’s get into the exercises.
Top Exercises for Working Around Hip Pain
In this section, we’ll go over the best exercises for building strength around your hips. You’ll see a video and a brief description of the exercise including cues, common mistakes, and how to correct said common mistakes.
Exercise 1- Supine Breathing
First, we have supine breathing. I love breathing exercises for people who deal with chronic pain because it decreases the pain signal. When we can decrease the pain signal, we feel better, and our body feels safer to perform activity.
Make sure to focus on a full exhale. Blow out all the air in your lungs, so you can engage the small muscles in your core.
Do that for 5 reps in your warmup after you foam roll and before you stretch. You can also do it any chance you get throughout your day. It’s never a bad time to practice quality breathing mechanics.
Exercise 2- 2-Leg Hip Lift
Second, we have the 2-leg hip lift. The 2-leg hip lift is a great exercise because it strengthens our glutes and other muscles involved in hip extension. Hip extension is important for many skills in life like standing up with a laundry basket or walking around. Therefore, we should strengthen this movement pattern as long as it is pain free. Remember, if it is painful, stop and find an exercise that is pain-free.
You should feel it in your glutes, not your lower back. Make sure to squeeze your glutes as you lift your hips. Imagine you’re trying to crack a walnut between your cheeks.
Do 3 sets of 8 reps.
Exercise 3- Seated Hip Flexion Holds
Third, we have seated hip flexion holds. Hip flexion is important for walking up stairs or hiking up mountains.
When doing seated hip flexion holds, maintain a tall posture. Don’t round your back as you lift your knee. You want to maintain a good, tall posture, so all the motion comes from pure hip flexion.
Do that for 3 reps per side for 5-second holds.
Exercise 4- Quadruped Hip CARs
Fourth, we have quadruped hip CARs. CAR stands for controlled articular rotations. In other words, circles with your joints. These are by far one of my favorite exercises to build mobility and stability in the hips.
Draw a huge circle with your knee forwards and backwards. If you feel pain in a specific area, move around that area. Don’t go through it.
Do that for three times each direction.
Exercise 5- Supine Pilates Ring Adductions
Fifth, we have supine pilates ring adductions. Hip adduction is important for being able to squeeze watermelons between your thighs and go viral on social media. Just kidding. Although if you get strong enough in this pattern, it could be true.
Hip adduction exercises are done for hip health. The stronger our hip adduction muscles are the better our hips feel.
If you don’t have access to a pilates ring, you can squeeze a med ball or a couple pillows between your knees instead. You can also buy one on Amazon for $20.
Focus on applying a squeeze that is pain-free. If you can squeeze with 100% intensity (i.e. get the pads of the ring to touch), great. However, if all you can do is apply a little bit of pressure to move the pads a little closer together, that’s fine too. Do what you can. Overtime, you’ll be able to do more.
Do 5-10 squeezes.
Conclusion
Do these exercises for two to three sets everyday. If you’re doing a full-body workout, you can use these exercises as your lower body work. For example, you can do a block of exercises that looks like…
- DB Bench Press 3×8
- Pilates Ring Adductions 3×5
- Front Plank 3x20sec
Remember, the keys to training around hip pain are (1) seek help from a physical therapist and a trainer; (2) if it hurts, don’t do it; and (3) progress slowly. Start off with something pain-free and easy. Then, gradually increase the difficulty with either increased volume or intensity.
If you want a coach to guide you along the way to feeling strong and moving well, so you can do more of what makes you happy, click here to apply for 1-on-1 online fitness coaching.